For the first time in several years Apple, macOS Sierra has ended support for some computers. This decision of the company was caused by a number of incompatibilities and deficiencies in hardware. However, to many users MacBook the reason does not seem compelling. The counter-argument is that some computers were selected for some unknown reason, while their more powerful contemporaries (such as MacBook Pro) were mysteriously left behind.
According to one version, Apple thus increases requirements in order to stimulate the purchase of new devices. There are no other compelling circumstances that lead to the emergence of unsupported computers. Often this version turns out to be justified – with the help of several tweaks and add-ons, a tool from dosdude 1 called macOS Sierra Patcher solves the problem of many computers 'incompatibility' with this version of the operating system. In this guide, we will show you how to install macOS 10.12 Sierra on older Mac versions that, according to the manufacturer, are incompatible with this operating system.
Today's list of devices that support macOS 10.12 Sierra includes:
- MacBook (Late 2009);
- iMac (Late 2009);
- MacBook Air (2010);
- MacBook Pro (2010);
- Mac Mini (2010);
- Mac Pro (2010).
For comparison, take a look at the table listing the computers on which you can install Sierra using macOS Sierra Patcher: 
It is worth noting that in the case of certain computers, according to the table, problems may arise. The most common is the lack of Wi-Fi due to the presence of an incompatible BCM 4321 card in some devices. The problem is often solved by replacing the card. Other devices (for example, MacBook Pro (2008/9) work so well that they do not require any modifications and only make you wonder why Apple found them incompatible.
Using one of the models in the table and want to test Sierra on it? Follow our instructions for creating a customized installer.
Instructions for installing macOS Sierra on unsupported Mac versions
1) Find a flash drive with a volume of 8 GB or more or create a partition on an external hard drive.
2) Format with GUID Partition Table and File System Mac OS Extended via Disk Utility app.
3) Download a copy of macOS Sierra 10.12. To download it via App Store, you will need access to a supported machine. However, downloading directly or via a macOS virtual machine can work around this limitation.
4) Make sure the Install macOS Sierra application you downloaded is in the / Applications folder.
5) Download macOS Sierra Patcher from dosdude developer.
6) Disable SIP on the machine where you are going to install Sierra. SIP should be disabled throughout the installation and even after. Don't worry: while it does reduce security somewhat, it's not the end of the world, and OS versions prior to El Capitan don't include SIP at all.
To disable SIP, reboot your Mac to your current recovery partition OS X, start Terminal and run the following command – “csrutil disable”.
7) When everything is ready, launch the macOS Sierra Patcher app.
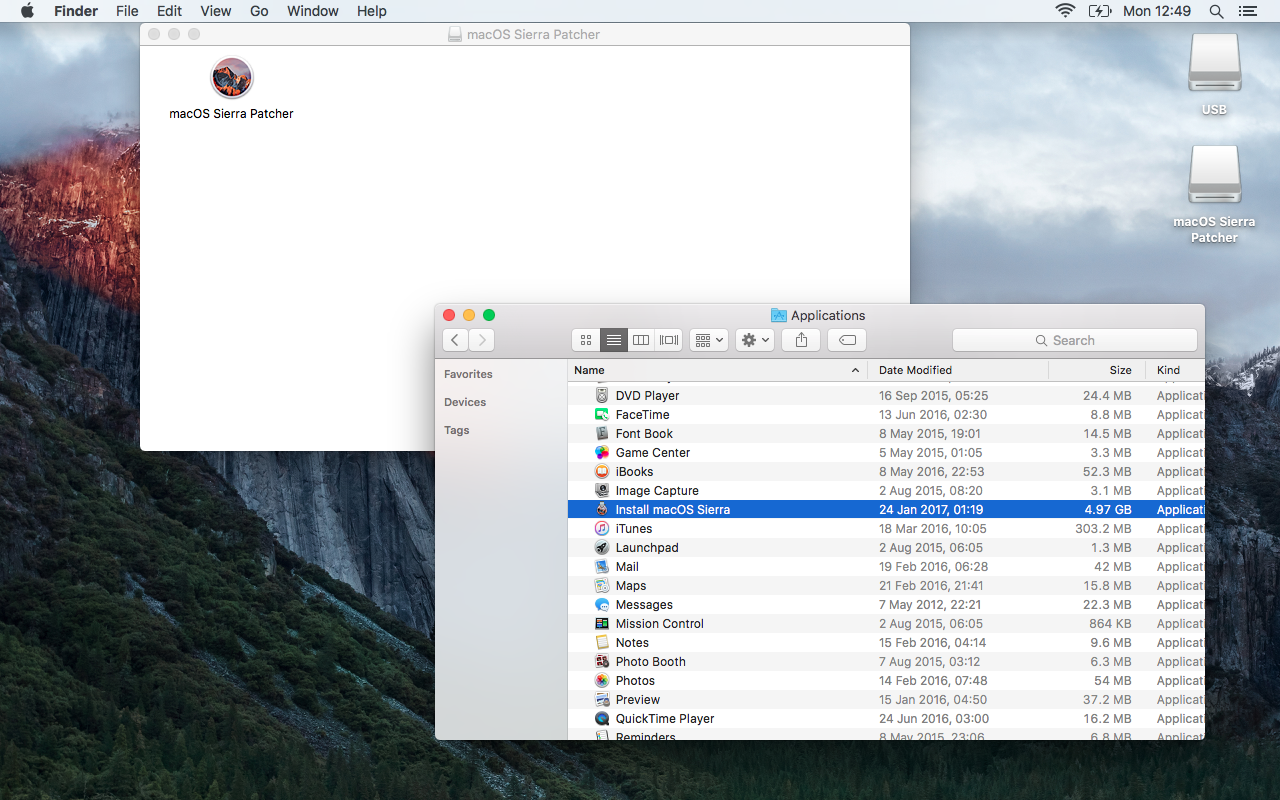
8) In this application, click on the Sierra install icon and specify the path to your copy of macOS Sierra in the / Applications directory.
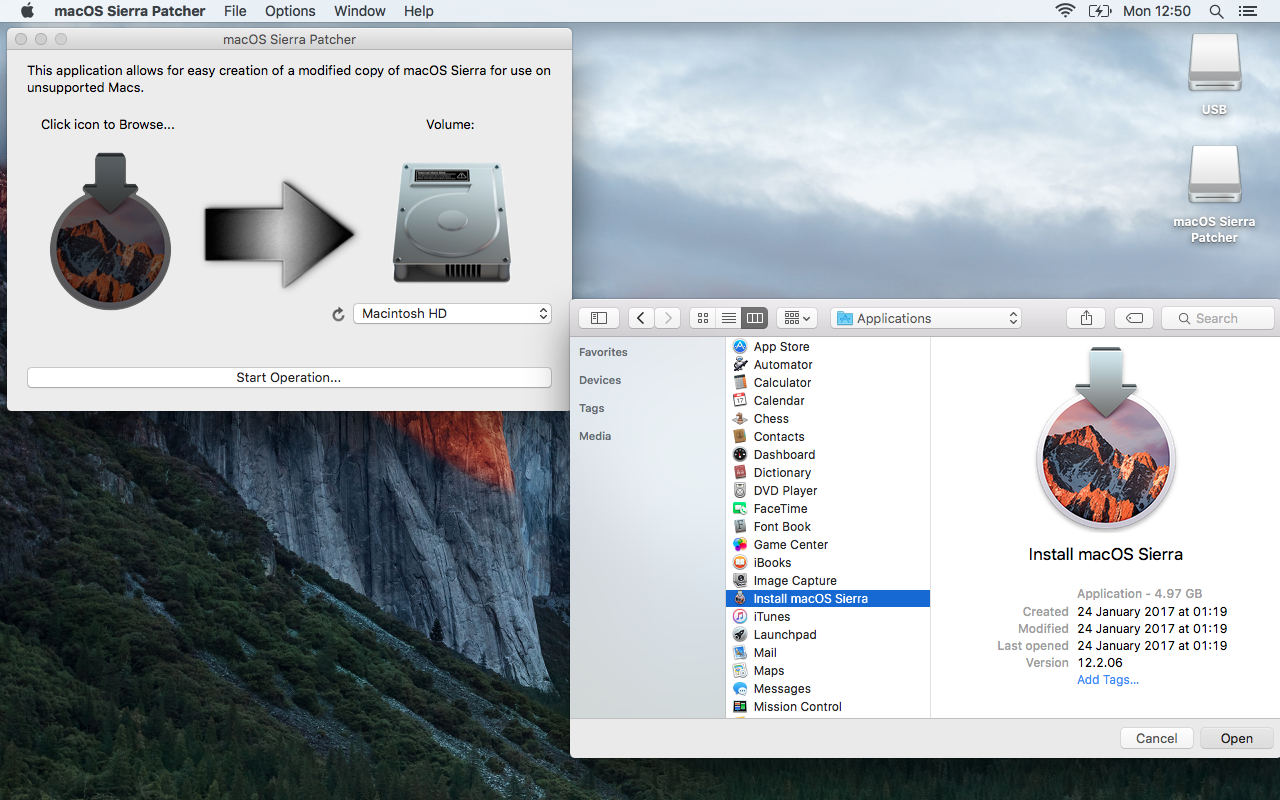
9) Click the Volume icon to select the partition to create the modified installer.
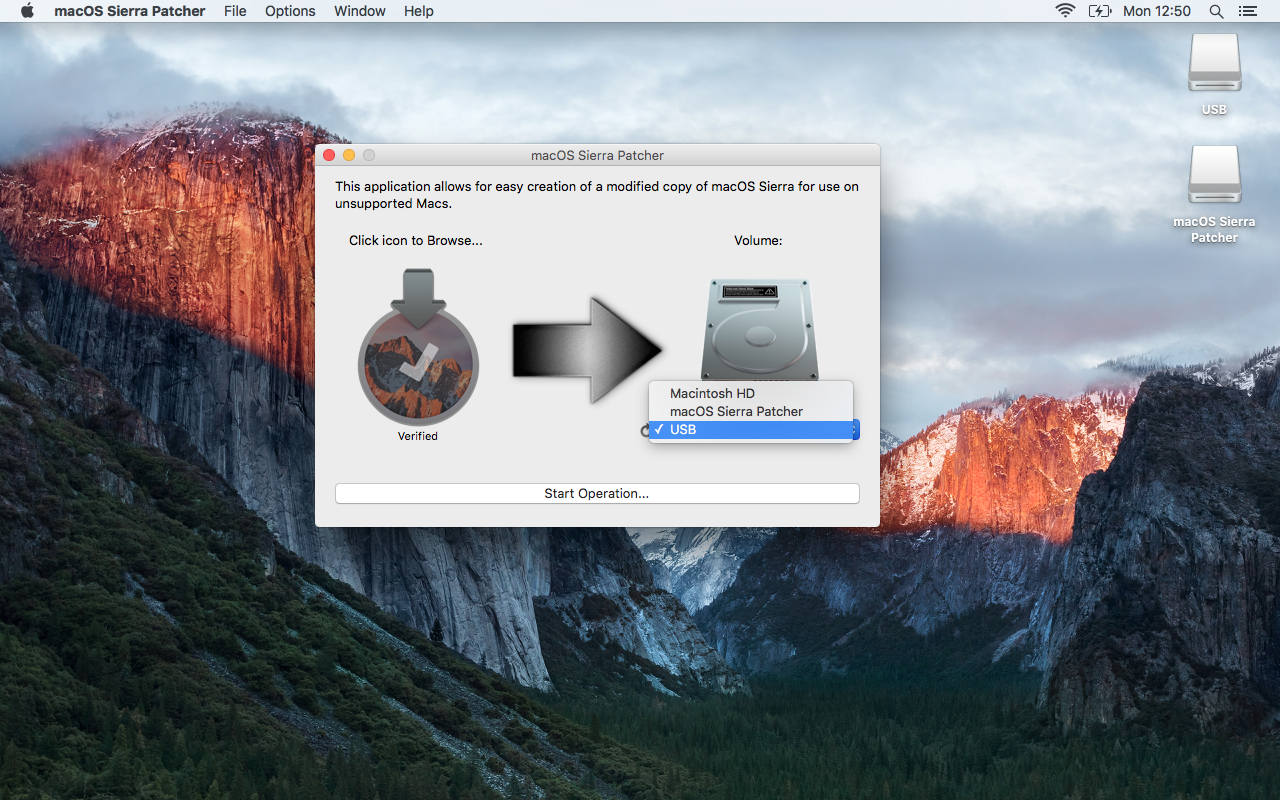
10) Then click “Start Operation…”. Enter your password when prompted. Sierra Patcher will create a modified macOS installer on the selected partition that is capable of running on unsupported devices.
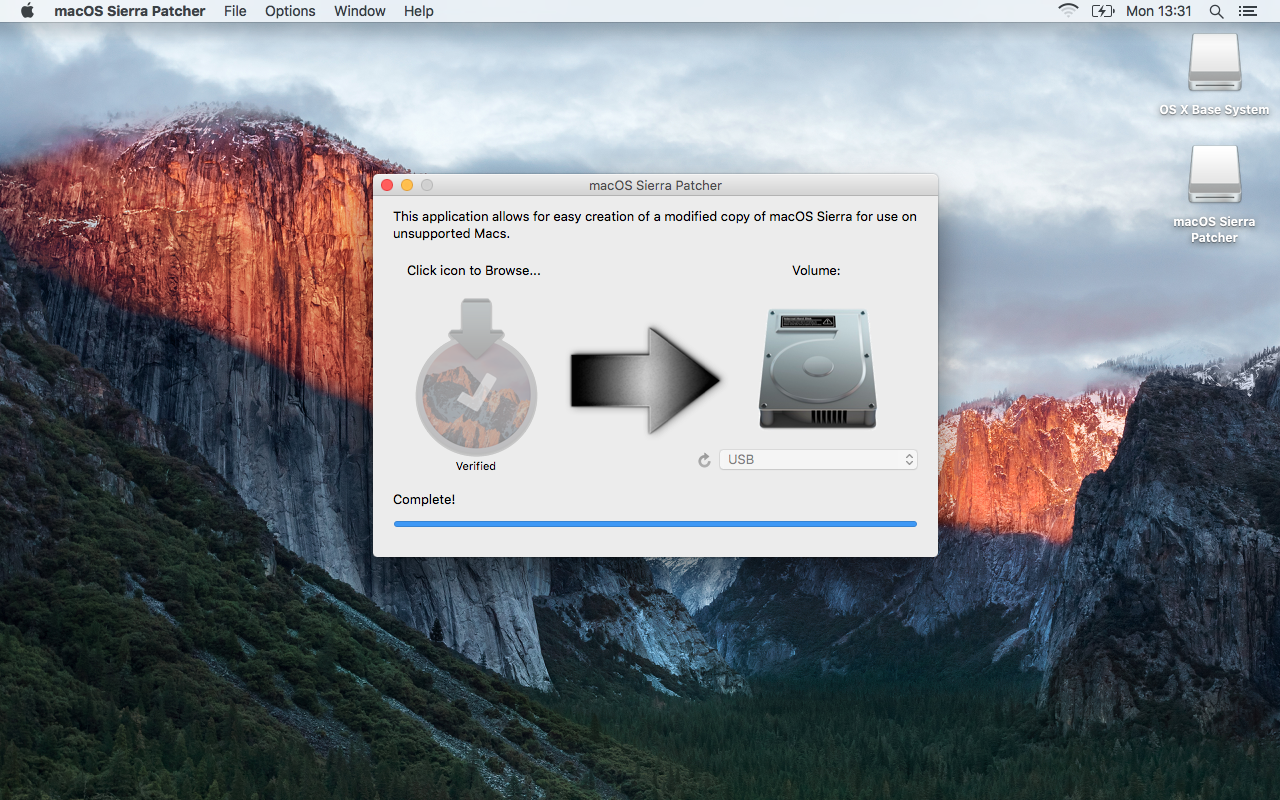
After creating the installer, Sierra Patcher will show the message Complete !. The disk partition or USB disk should now be labeled “OS X Base System” instead of the previous name.
11) Hold the Alt / Option key while turning on the computer. This will allow you to select a boot device — in this case, a USB drive.
12) Select the required device from the list to start downloading from it.
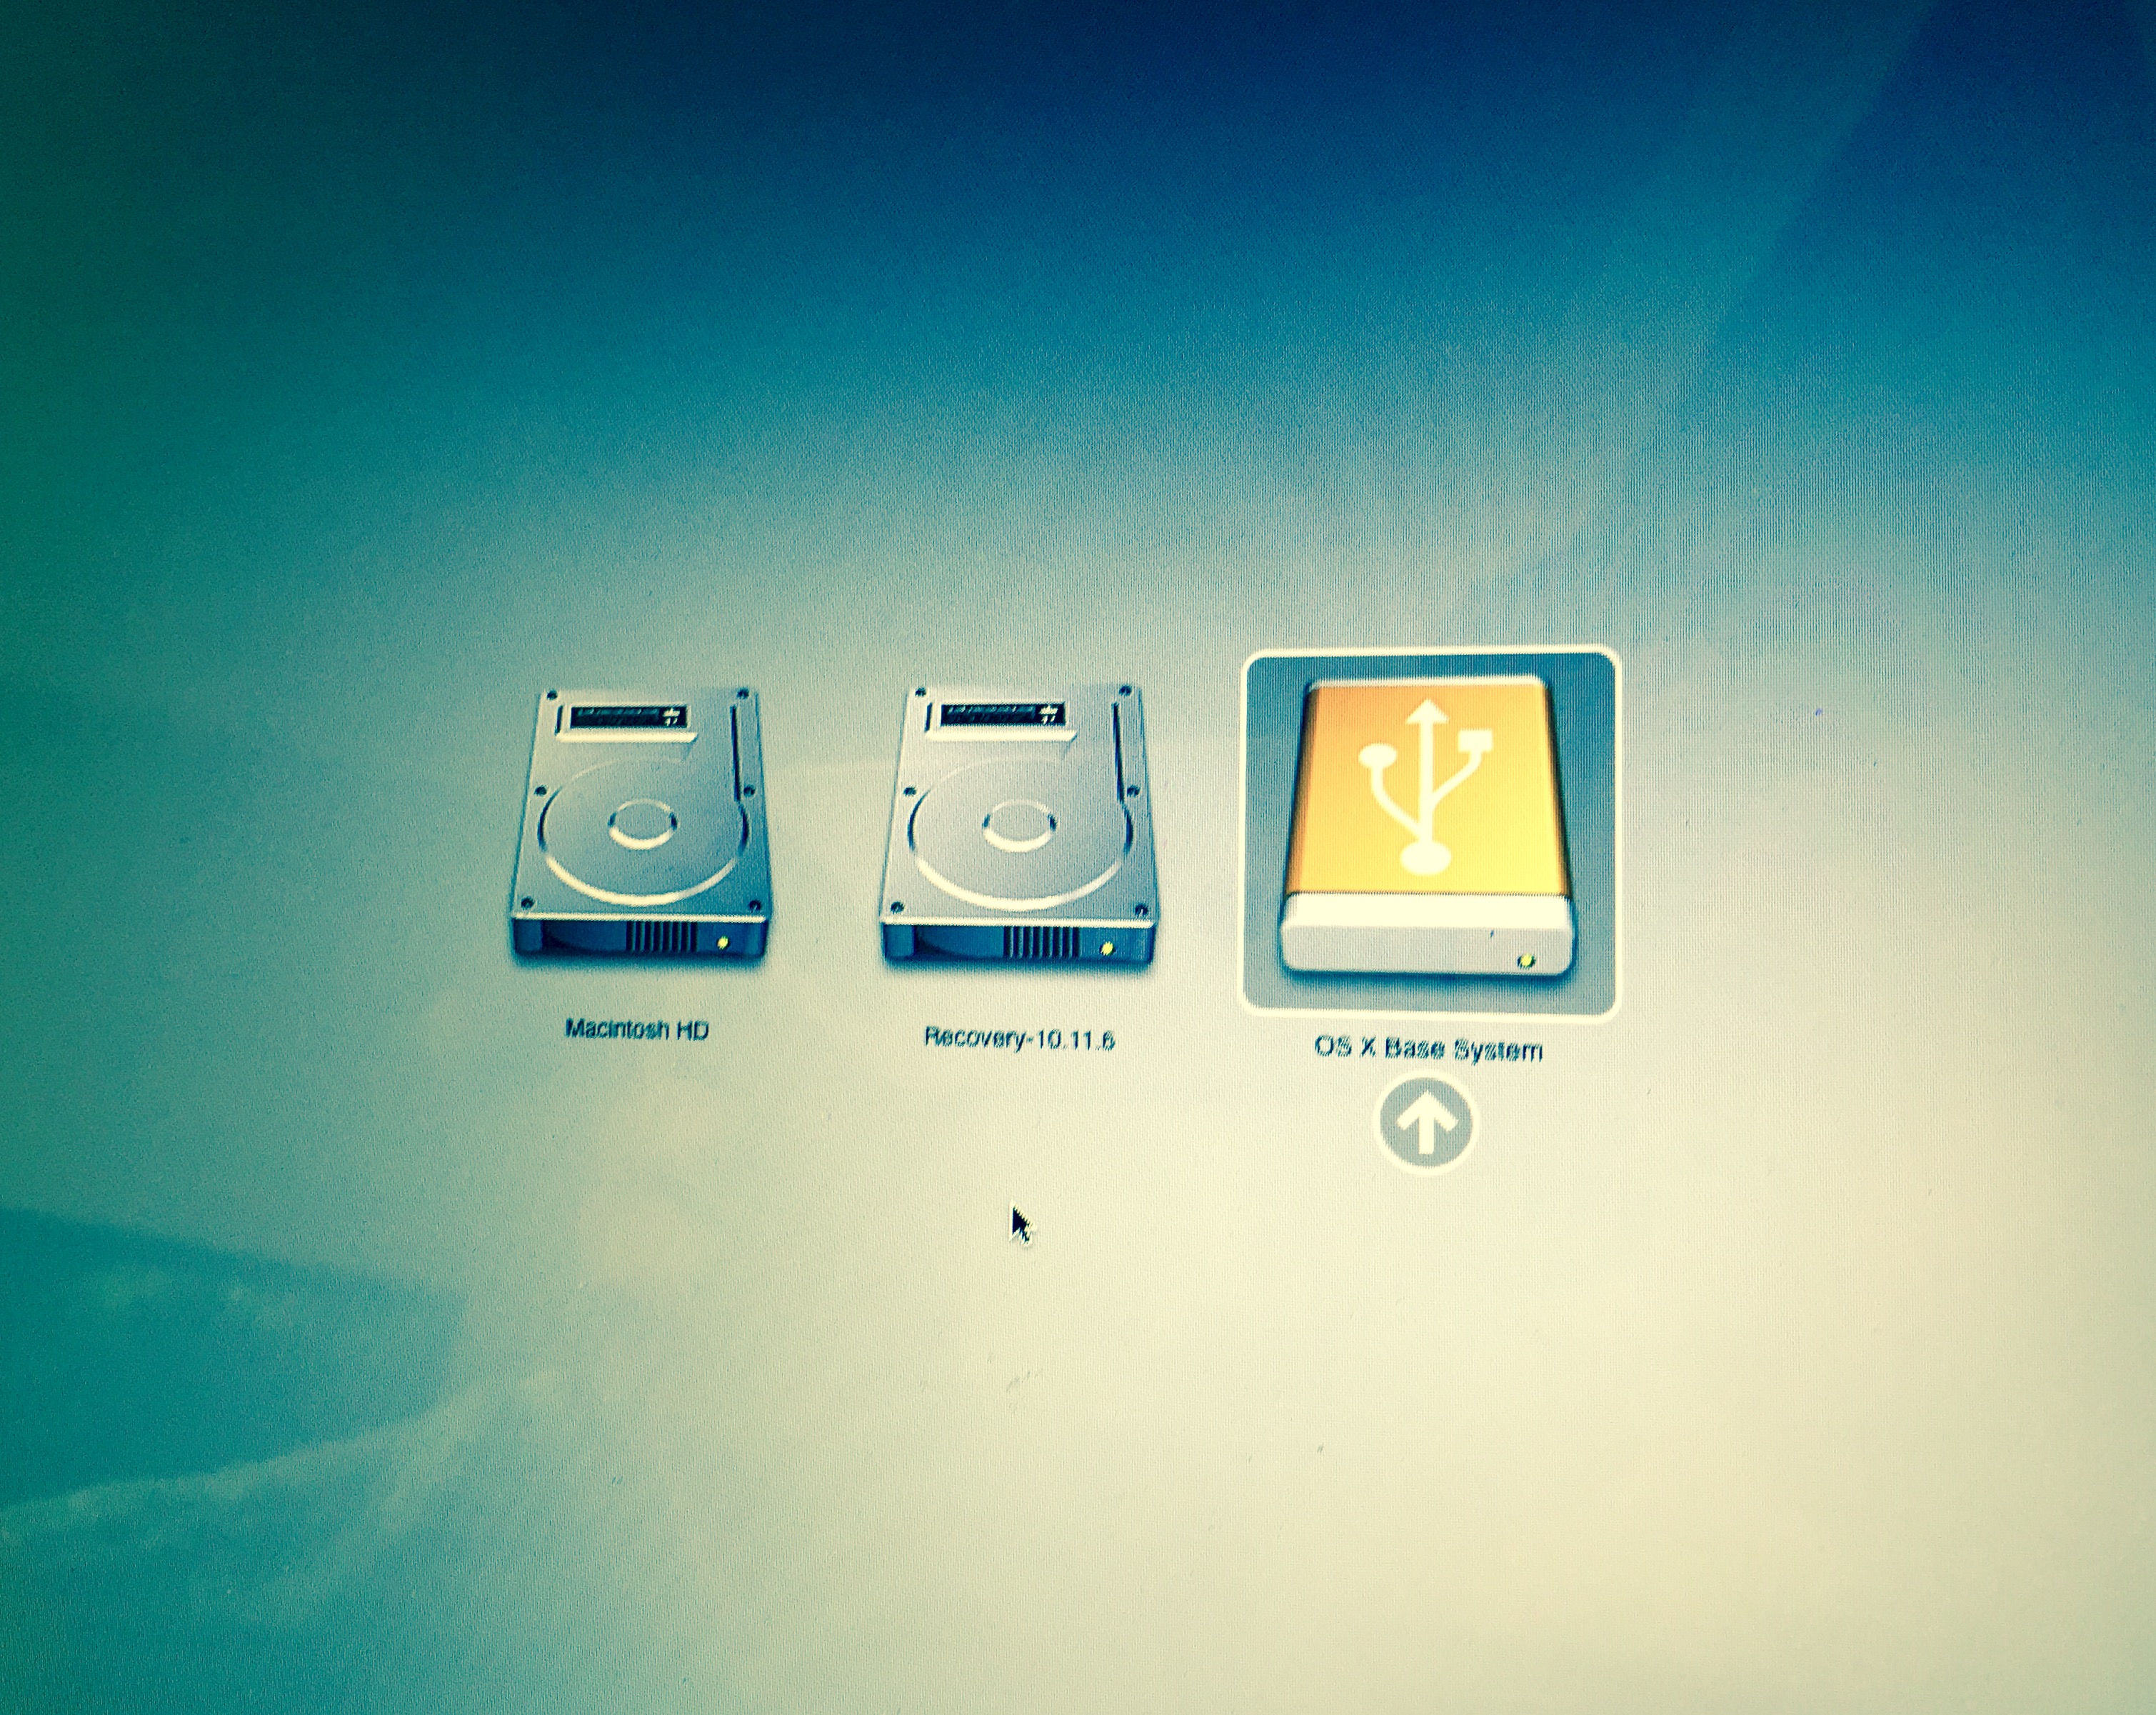
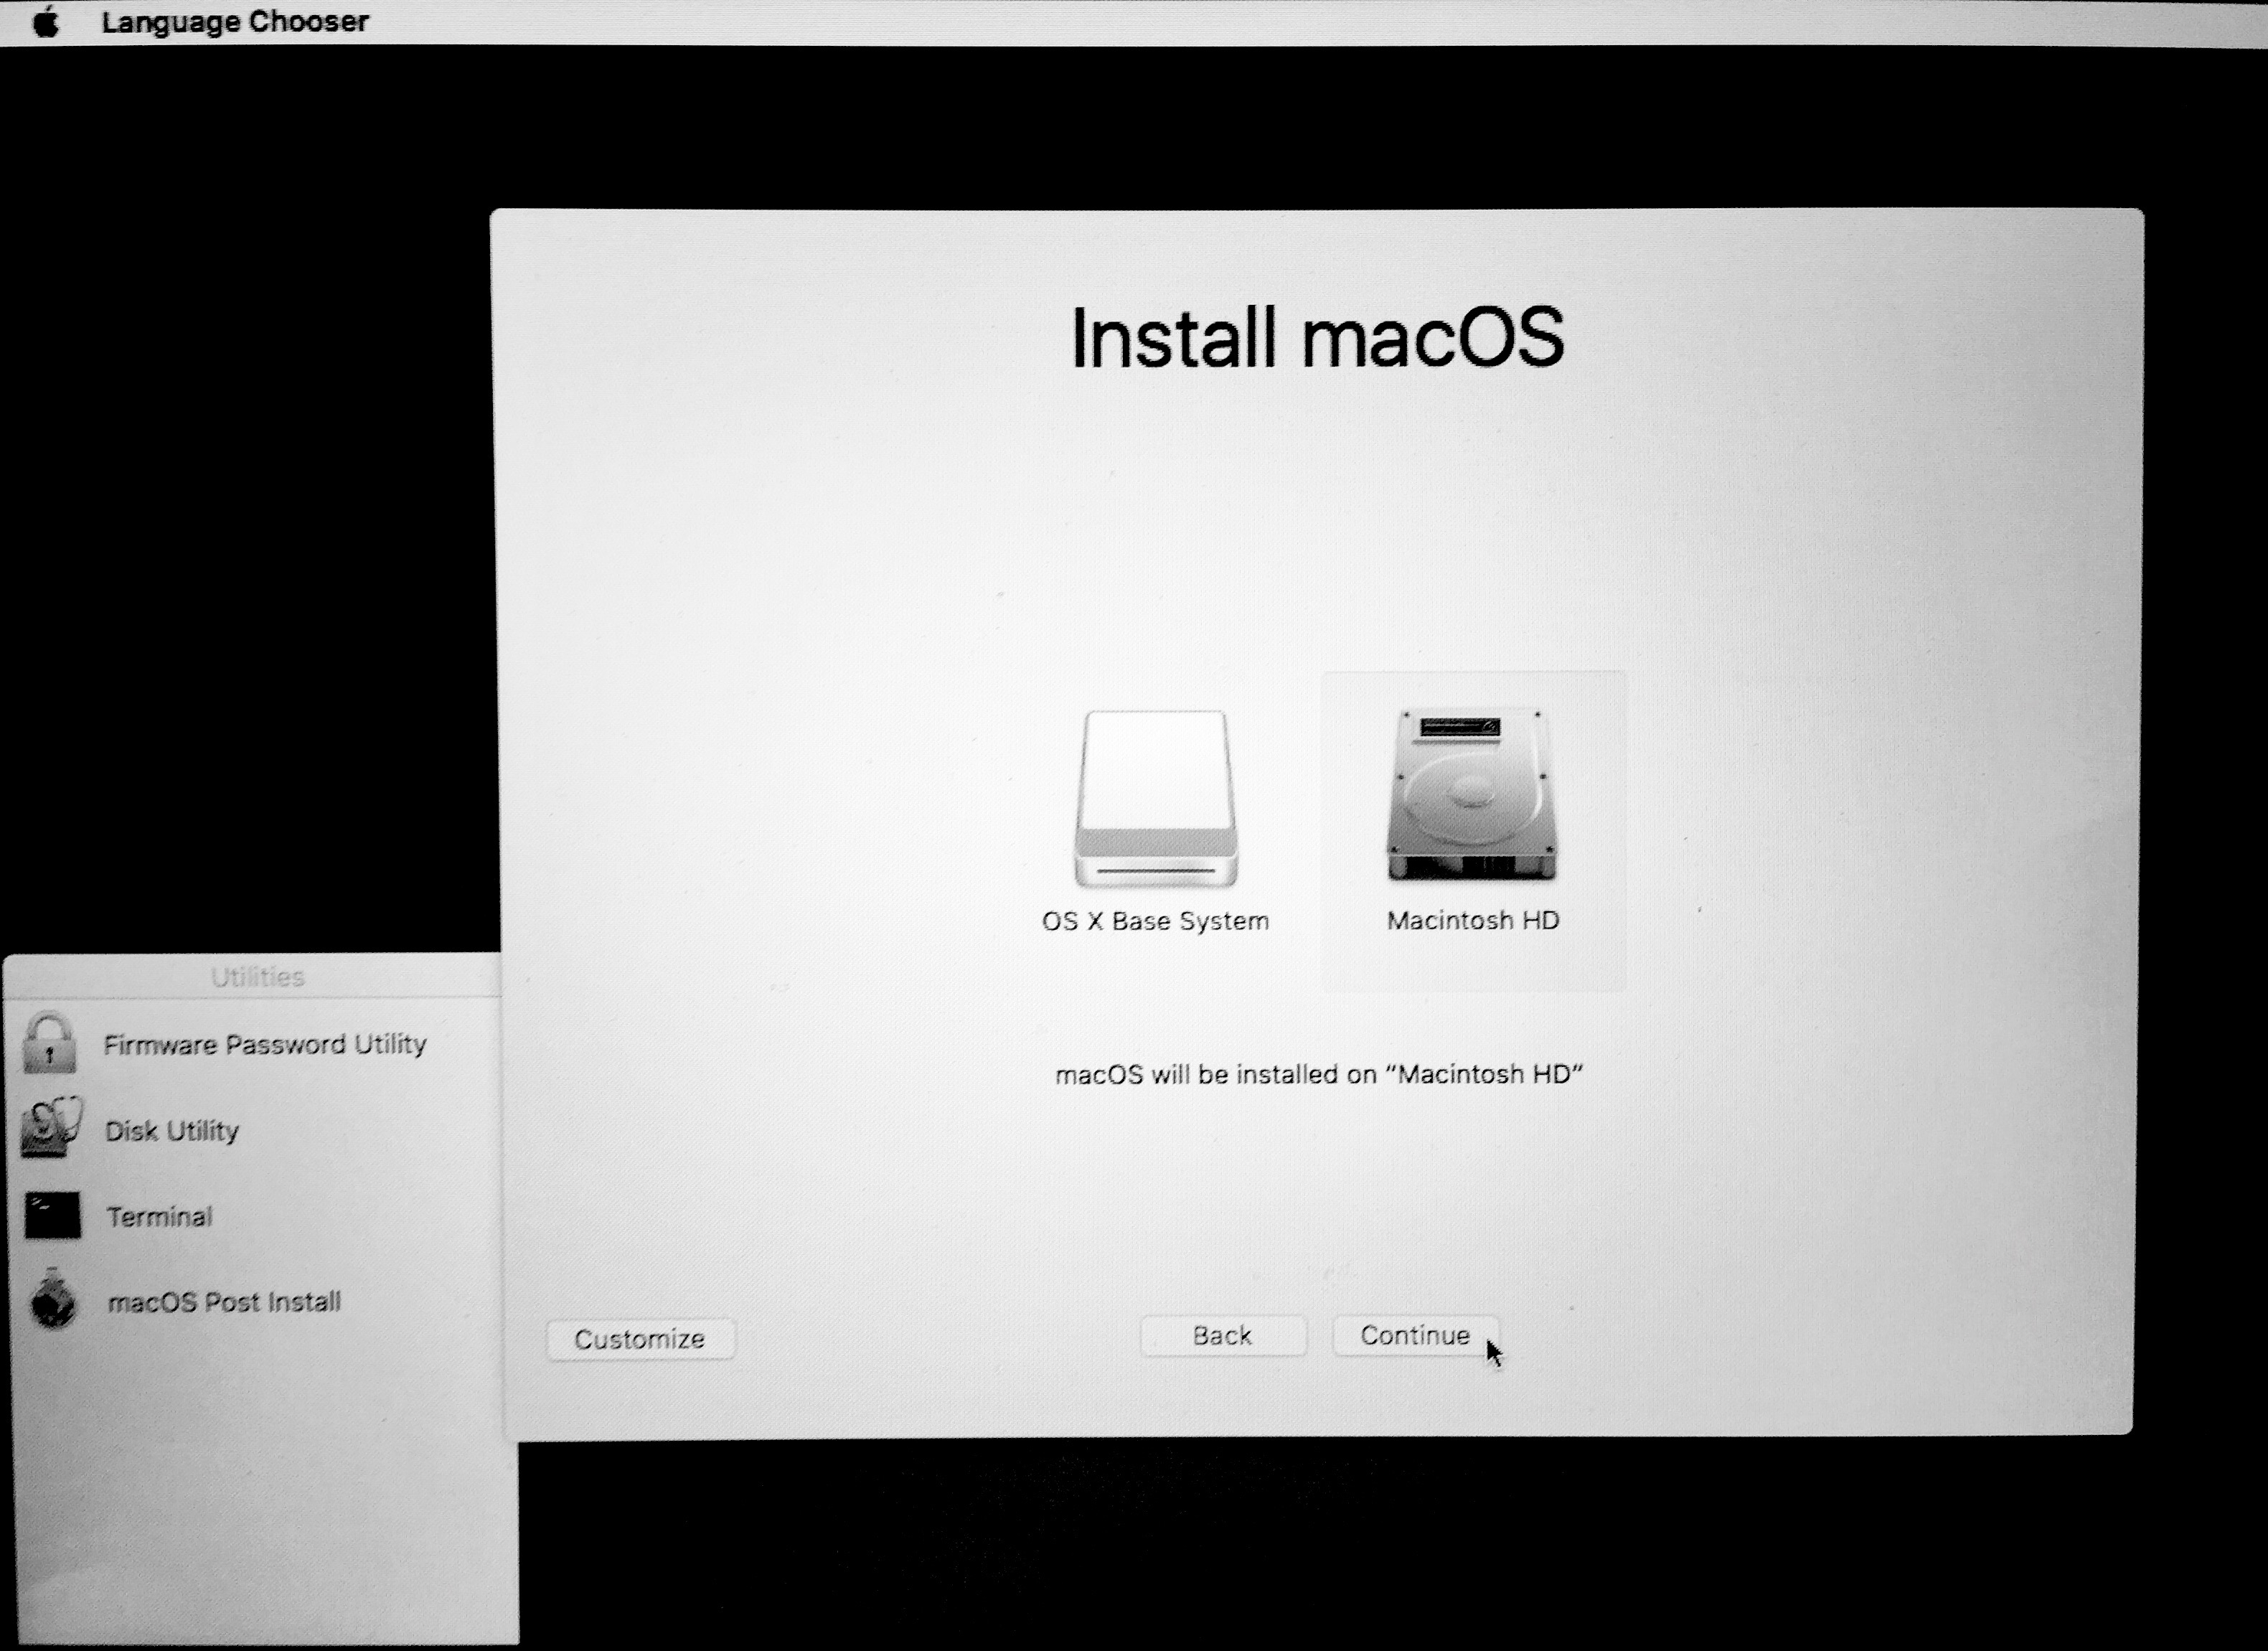
13) After launching the macOS installer, follow its instructions, choosing your computer's hard drive as the partition where the installation will be carried out. If you are installing from scratch, use Disk Utility (located in the Utilities section of the installer) to pre-clean the target partition. This is recommended for a complete reinstallation. However, if you want to keep the existing installation OS X or just update, run the installer without cleaning the disk.
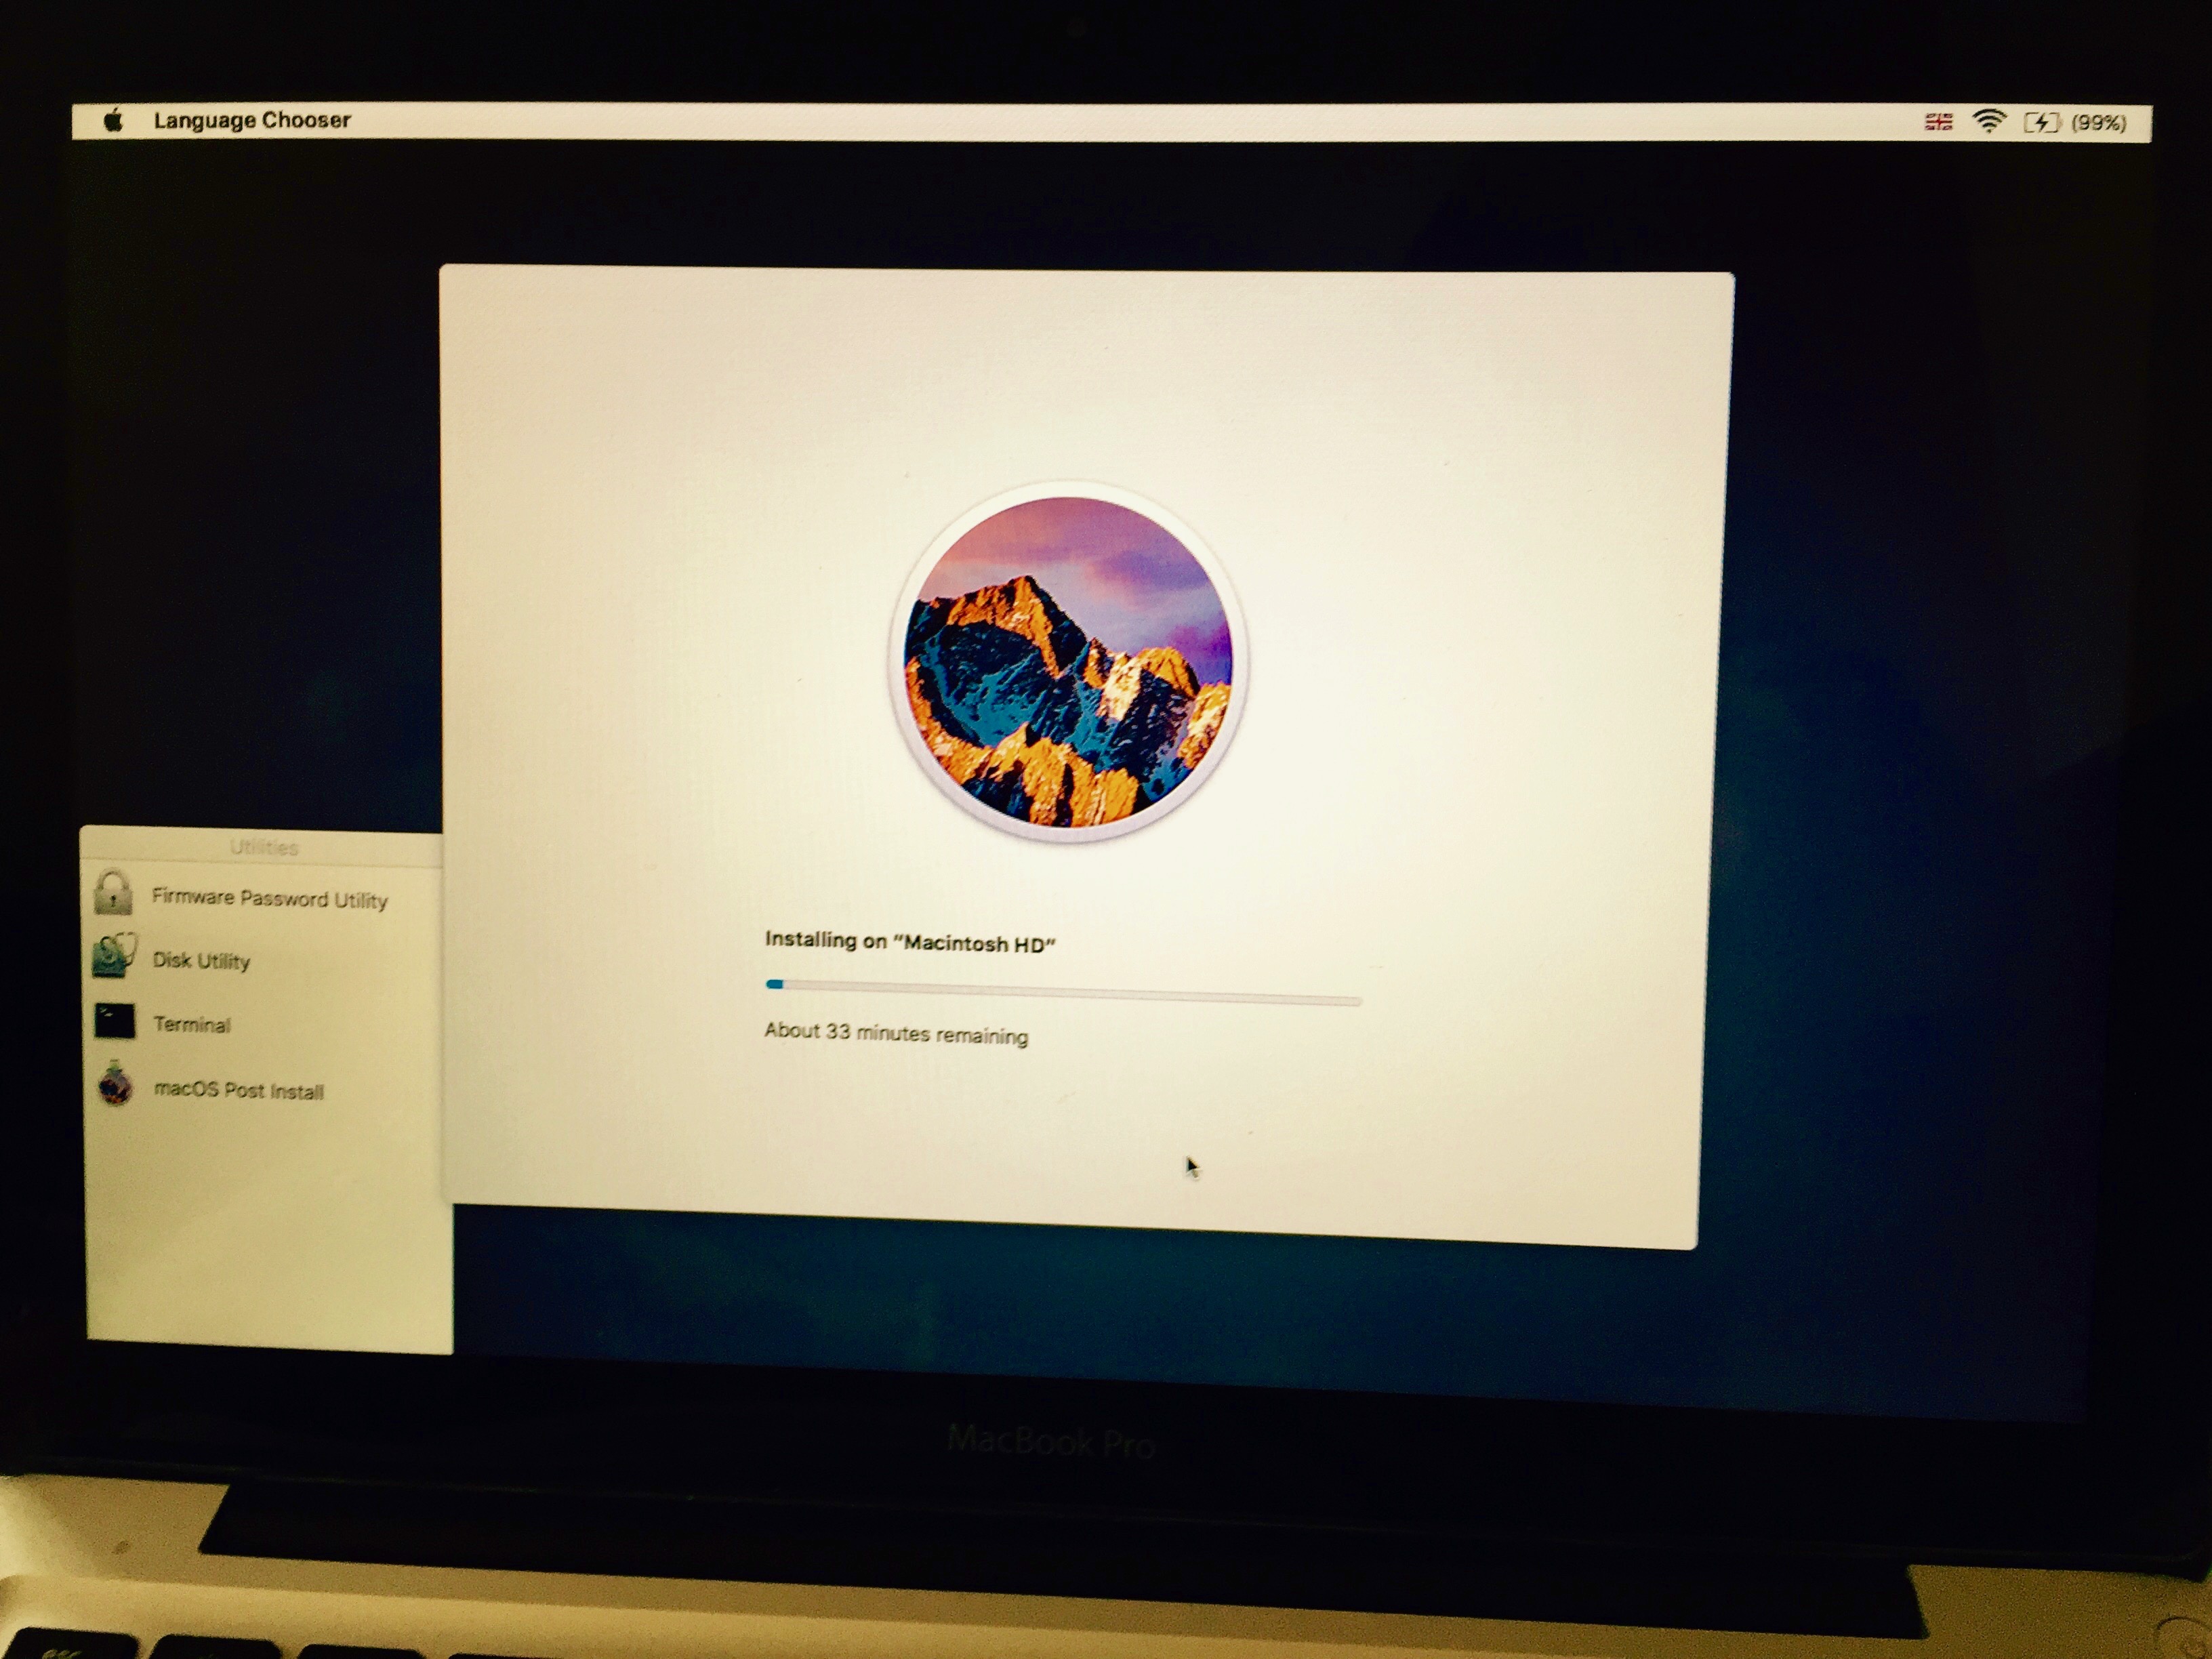
The installation should now begin. Watch its progress, because in the middle of the process there will be a reboot, after which your actions will be needed.
14) When the reboot begins, hold the Alt / Option key to reopen the boot device selection screen. If you miss the restart, don't worry: the computer will try to boot, but it won't be able to. Just hold the power button until it turns off and turn it back on, remembering to hold down the Alt / Option key.
15) On the boot device selection screen, select the installer partition again.
16) After downloading the installer, you need to install patches to run Sierra. Instead of running the Install Sierra program, choose macOS Post Install.
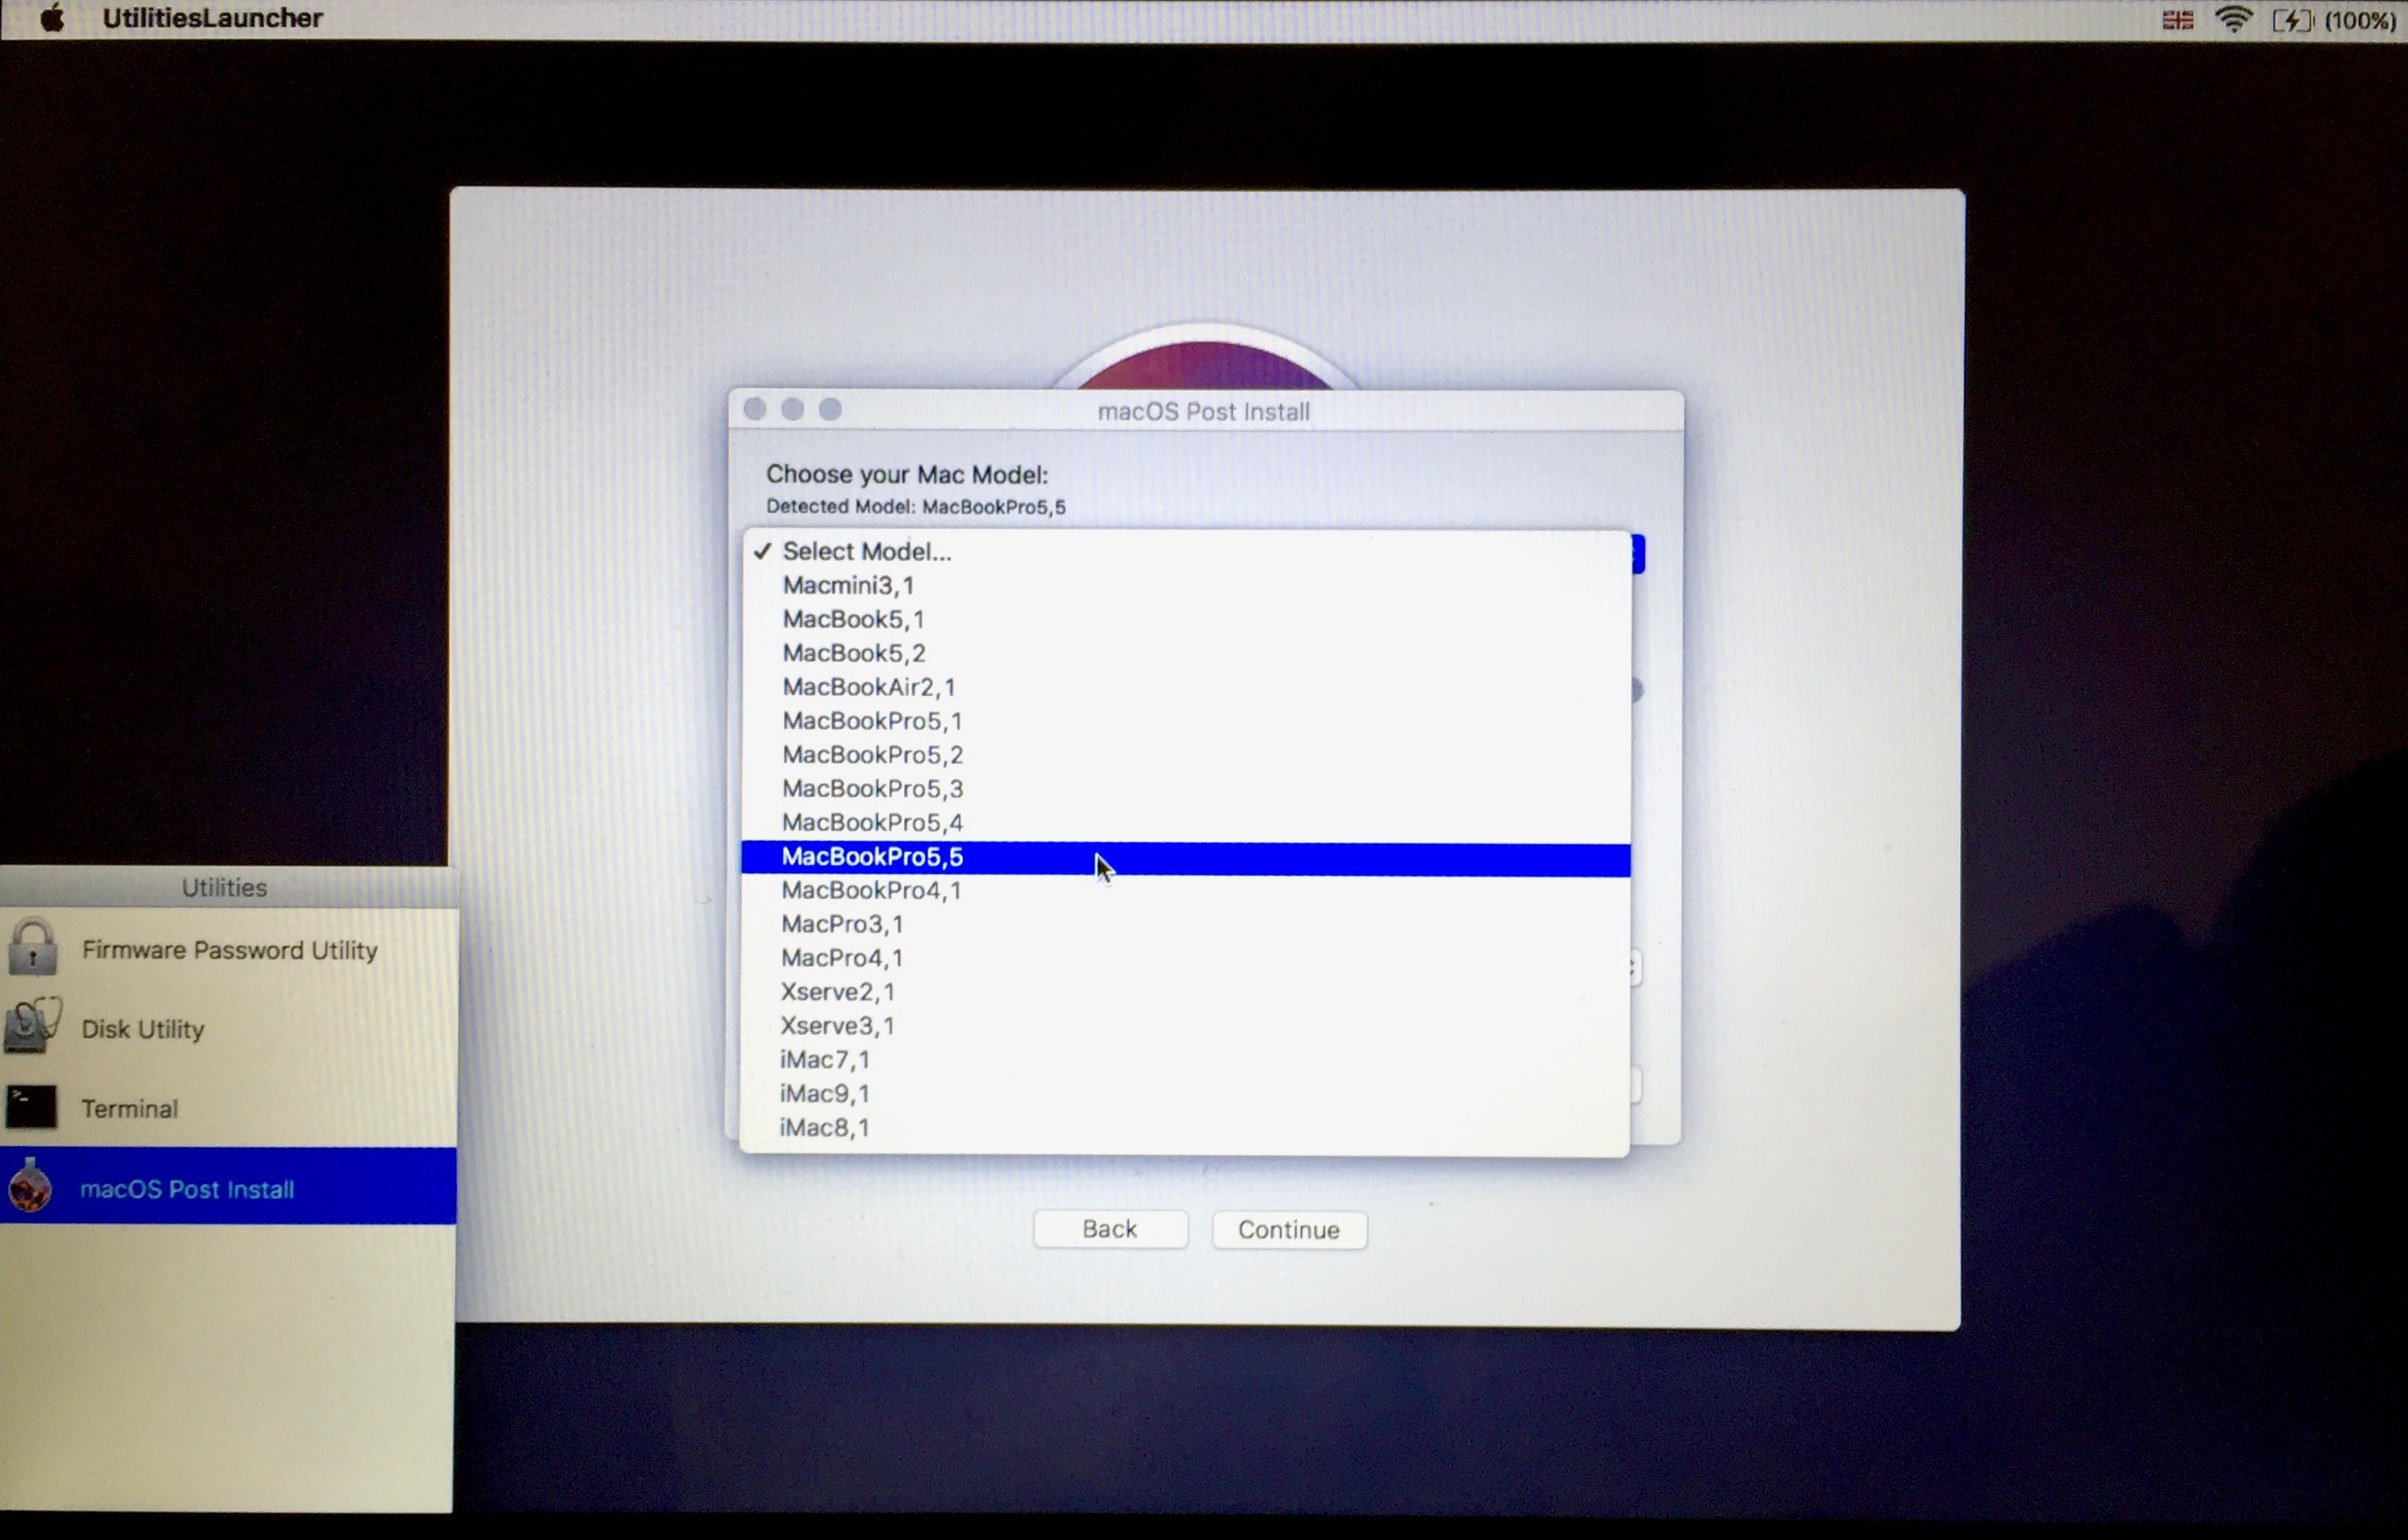
17) Post Install should automatically detect your Mac model. Check that it is defined correctly; if not, select your option from the drop-down list. Our MacBook Pro 5.5 program has detected correctly. If you are not sure which model you have, search for it by name and year of manufacture, or use Mactracker for Mac or iOS.
18) After selecting the correct model, the program will automatically select most of the current patches for your machine. If you are unsure of what you are doing, do not change anything. We can recommend the Recovery Partition Patch, which makes it possible to boot from the recovery partition. This is the only required patch not included by default.
19) Make sure the partition you are installing the patches on is the partition on your Mac where you burned the OS. Do not install them on a USB partition or anywhere else. After that press the button to install the patches and reboot. Please note that you do not need to check “Force Cache Rebuild” as shown in the picture. This option is only useful in cases where your patches are not working for some reason.

20) During the last reboot, hold down the Alt / Option key. This time, instead of the installation partition, select the target where you installed the system. Ours is called Macintosh HD.
The computer will now boot up and complete the installation. Confirm its completion. You will get a fresh install of Sierra on your de jure unsupported Mac. If things like Wi-Fi and USB don't work after the installation, reboot the installation partition and reapply the patches.
It's all!
The patcher is still being updated, which gives hope that it will work with future versions of Sierra. It looks like most El Capitan users will still be able to upgrade: everything including Siri works fine on our MacBook Pro 13 ″ 2009 release. A recent update to the tool even made it possible to receive macOS updates through the AppStore.
Important! If you are using Hackintosh instead of a real Mac, there is no need for a patch. All that is required is to stop using SMB IOS, after which the computer will be recognized as a supported device. The patcher is only needed for factory MacBook.
Are you using a computer that is not compatible with macOS Sierra? Let us know in the comments if the instruction will allow him to start a new life.
