This video was taken in 1994, but many people still don't know how the Internet works at all. Most people are completely ignorant of things that are obvious to you and me and do not know abbreviations such as HTTPS, CDN or DNS. As long as they can enter the correct address into the line in the browser, everything is fine. But in order for the resource at this address to be found among all the websites in the world, the DNS (Domain Name System) system is used, which matches the unique IP address of the site with its convenient domain name.
Your choice of DNS server can have a significant impact on the broadcast speed of your Apple TV or other streaming device. Your ISP uses their default DNS server, but you can reconfigure the DNS as you see fit.
![DNS - Apple - TV [1]](/wp-content/uploads/images/kak_pomenyat_dns-server_na_apple_tv_ith.jpg)
Okay, but why would I need to reconfigure DNS, you ask. The bottom line is this. Some ISPs do not use services or do not have access to fast DNS servers. And since Apple TV Gen 4 introduced App Store, internet connection quality and DNS server performance are becoming important factors to consider when downloading and shopping in the store. In addition, if you are experiencing problems with the speed of content download and Internet access, changing the DNS server to Apple TV can again help you. By changing the server, you can use a service like UnoTelly to watch content that is not available in your region (for example, Netflix).
Which DNS server to use
Here are some options:
- Google DNS: Google has free DNS servers that are fast, high quality and reliable. To use them, enter any of these addresses in the DNS field (how to do this is explained below):
- 8.8.8.8
- 8.8.4.4
- OpenDNS: Open DNS is another good free DNS service. Its servers are located at addresses:
- 208.67.222.222
- 208.67.222.220
You can easily find a bunch of other similar free services on the Internet. Search and choose the best one!
How to change DNS server to Apple TV (4th generation)
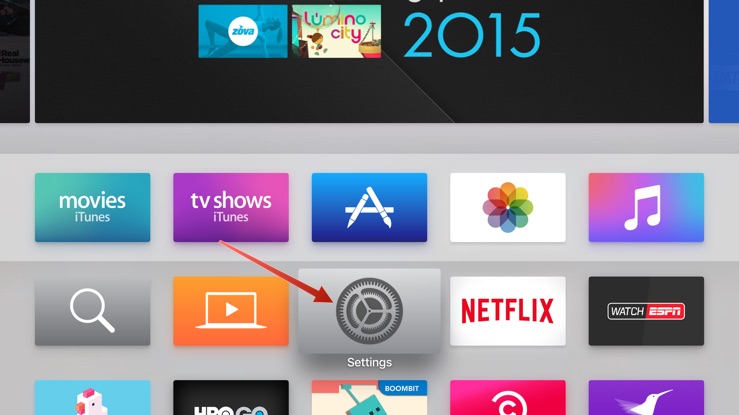
- Open the Settings app.

- Open the Network window and select your current Wi-Fi network.

- Then click on your network again to open its information.

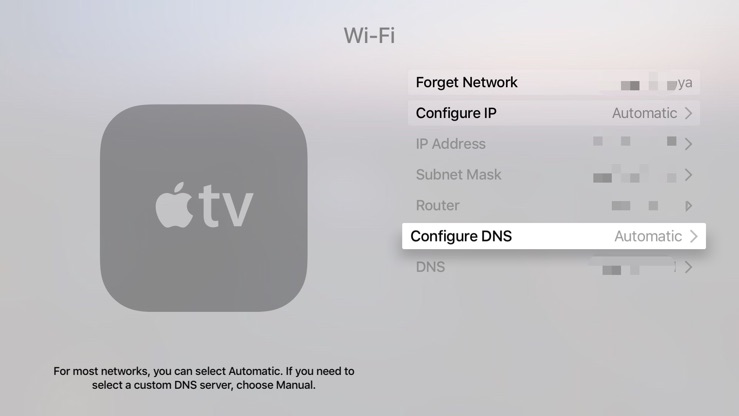
- Click on DNS Settings.
- By default, there will be automatic settings, select the Manual option.

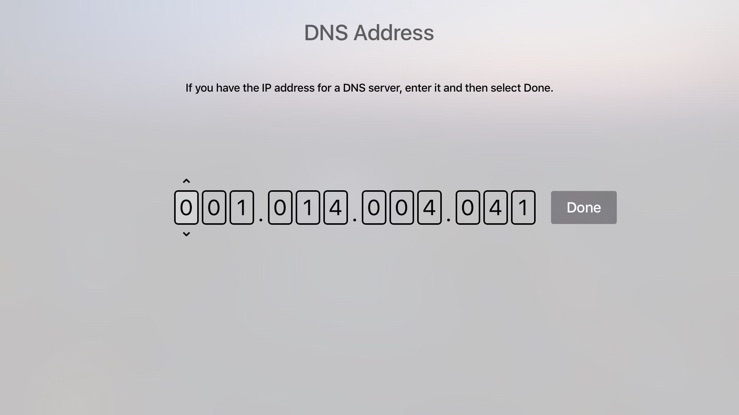
- Enter DNS. In the input field, there are three digits for each segment of the address, if there are fewer numbers in any segment of your address, it will be padded with zeros at the beginning (instead of 0.1.2.3 it will be 000.001.002.003).

- Click Finish and that's it!
How to change DNS server to Apple TV (previous generation)
- From the main menu, tap on Settings.
- Go to General.
- Go online.
- Click on Wi-Fi at the top of the window.
- Click on your network.
- Click on DNS Settings.
- Select Manual.
- Enter DNS. A similar rule applies here: the address 8.8.8.8 is changed to 008.008.008.008 to Apple TV.
- Click Finish.
Have you tried changing your ISP's standard DNS server to something else? Did the internet get faster after that? Let us know in the comments.
