The Voice Recorder app in iOS 12 has been significantly updated. In addition, it is now also available on iPad and Mac. The design of the Voice Recorder has not changed from the days of iOS 7 to this time. Now it has big headlines and a lovely dark theme.
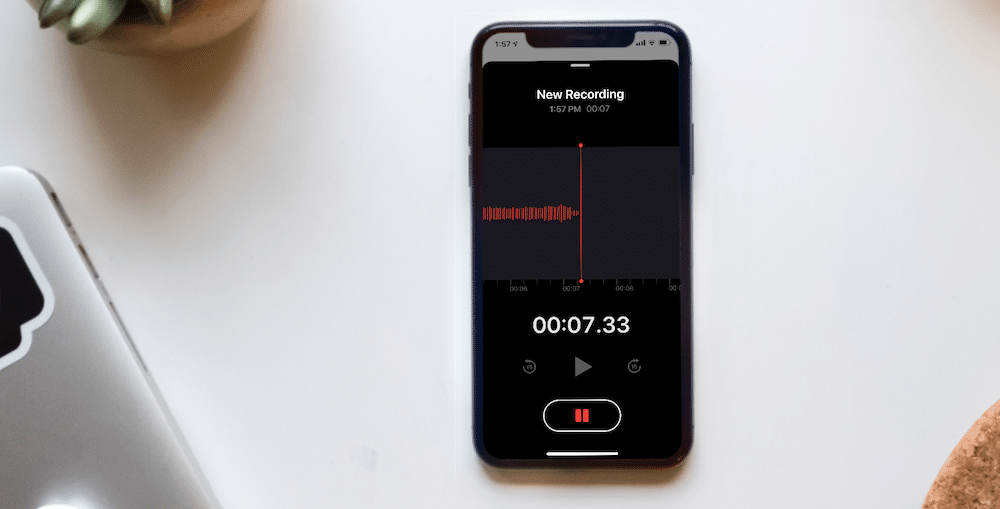
If you are now confused about the functions of the application, do not worry, below we will help you figure it out.
Also Read: Top 12 Features iOS for iPhone
- How to make notes in Dictaphone iOS 12
- How to rename a recording
- How to share posts
- How to duplicate a post
- How to edit posts
- How to sync records via iCloud
- How to completely delete an entry
- How to automatically delete entries
- How to change the sound quality
- How to change the standard names
- Tip: start recording from Control Center
How to make notes in Dictaphone iOS 12
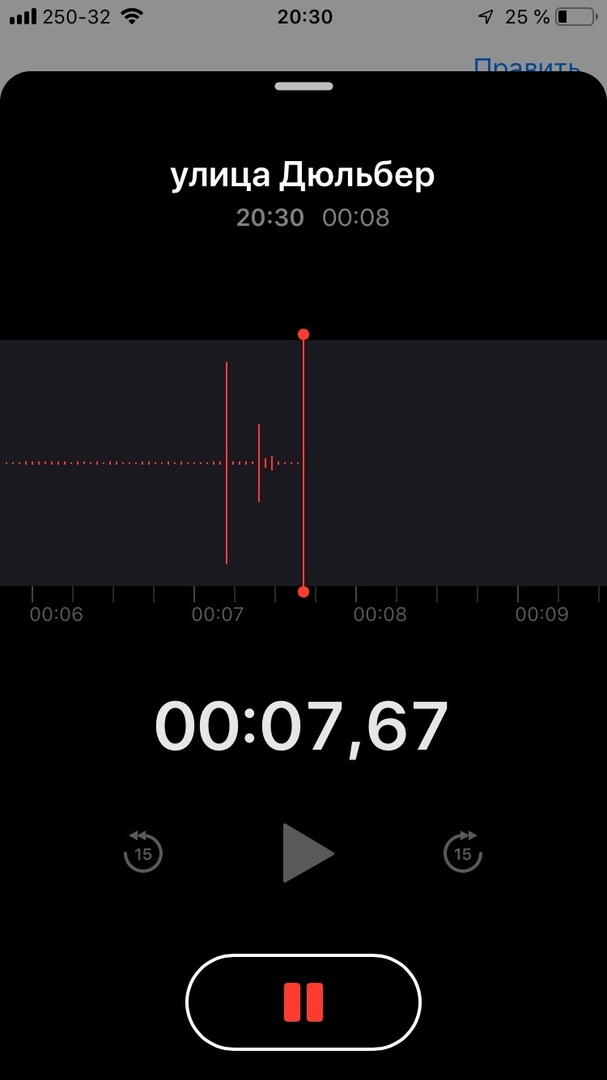
Let's start with the main thing. It's still a voice memo app. To start a new recording, open the app and tap on the big red button at the bottom of the screen. A screen will open with the recording and the sound wave changing in real time. This means that the recording has started.
You will notice that the pause button is nowhere to be found. Click on the soundwave part to open the recording in full screen. The record button will turn into a pause button. Click on it to pause the recording. It will turn into a Resume button, the functionality of which is obvious.
While paused, you can move the sound wave to move through the recording. You can also use the rewind buttons.
How to rename a recording
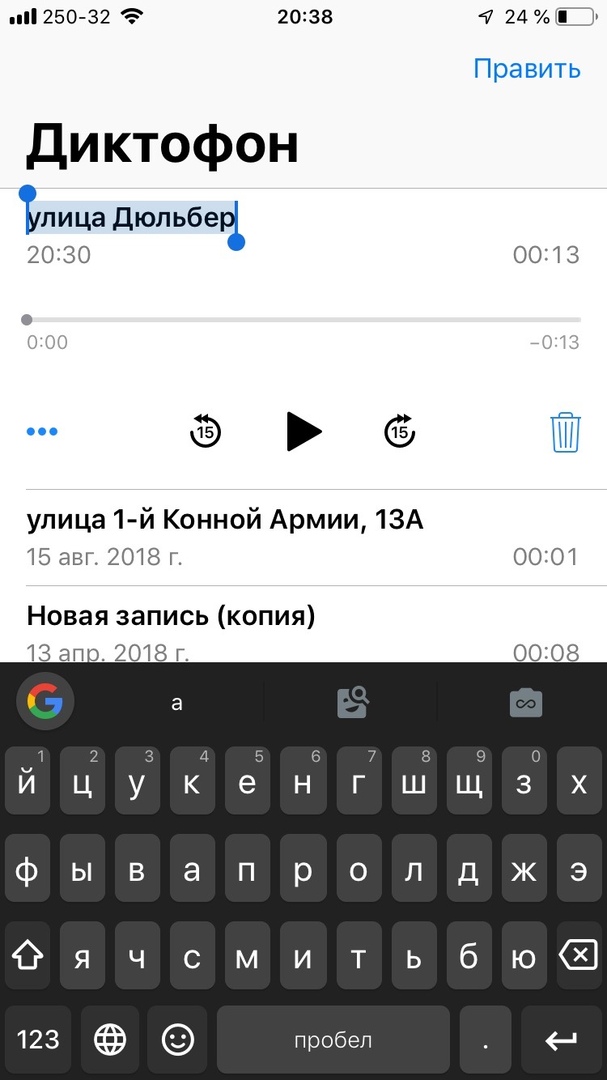
The new naming system for voice memos is rather strange. By default, they are named after the location where the recording was made. If you record multiple recordings in the same location, this can be a problem. Don't worry, the names can be changed.
When the entry appears in the list, just tap its name. It will highlight and the keyboard will open. Type in a new name, hit Enter, and you're done!
How to share posts
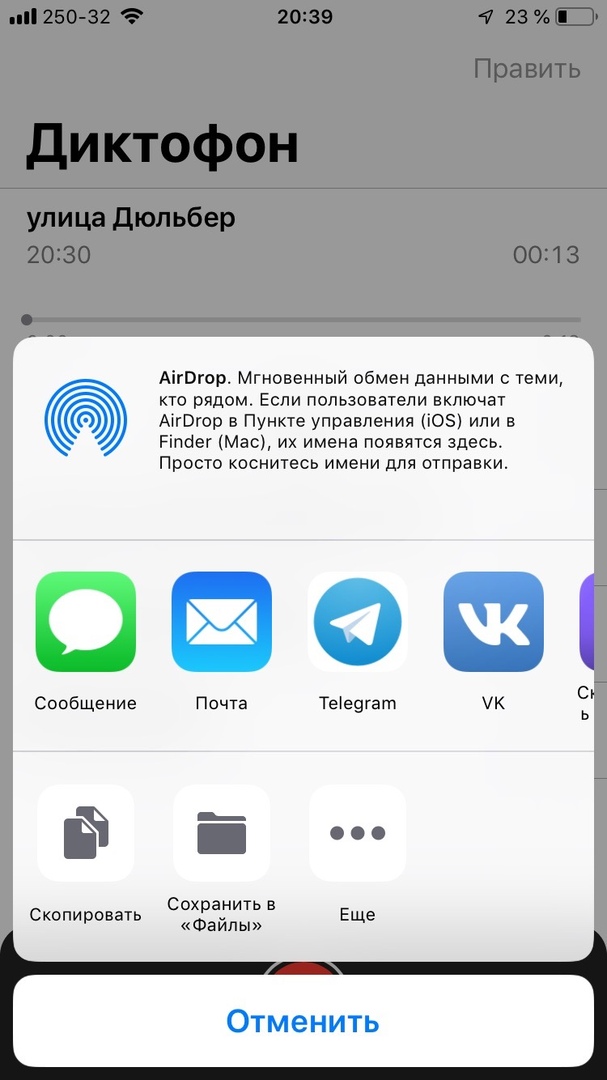
Want to share your recordings with friends or colleagues? This is very easy to do.
Tap the entry you want, then tap the three dots in the lower left corner and select Share. A familiar menu will open where you can choose how to share the recording.
You can send the entry via WhatsApp, Gmail, or any other app where you can share files. You can add it to the Files or Dropbox app, and generate a share link. For example, if you select the Mail app, the entry will be attached to an email in m4a format.
How to duplicate a post
Recorder can be trimmed and edited in Dictaphone. However, before doing this, we recommend that you duplicate the entry you are going to edit just in case, in case something goes wrong.
Select the entry you want, click on the three dots and then select 'Duplicate'. The copied file will immediately appear in the list below the original.
How to edit posts
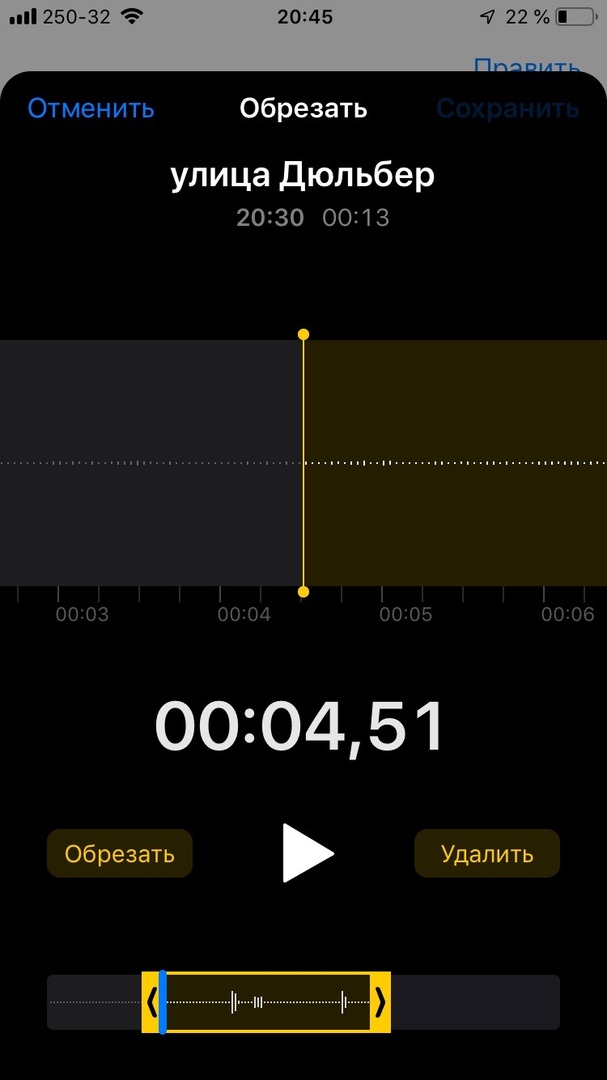
Click on the three dots and select the 'Edit' option. An editing window will open. Here you can trim the recording, as well as delete or replace parts of it.
Replacing a part is the easiest, but also the most dangerous. In fact, a new live recording will appear instead of the selected part, so use the option carefully.
With cropping, everything is clear. Click on the blue crop icon in the upper right corner and your entire compressed recording will appear at the bottom. Click and drag the edges of the yellow frame to select the desired start and end of the recording. You will see two options: crop and delete. The 'crop' option will remove everything except the part in the yellow frame, and the 'remove' option will do the opposite.
When you're done editing the post, click Save.
How to sync records via iCloud
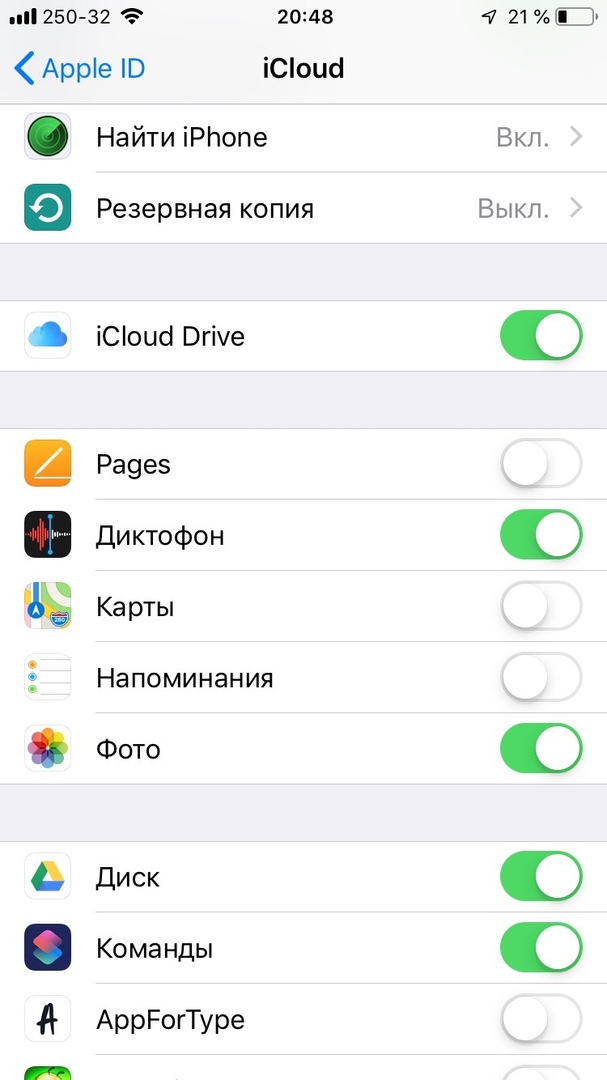
Voice Recorder is now available on iPhone, iPad and Mac, so you can sync all your recordings via iCloud.
Open Settings, click on your Apple ID at the very top, select the section iCloud. Here, click on the switch next to Voice Recorder so that it turns green.
How to completely delete an entry
Now the Voice Recorder application deletes recordings like the Photos application. After you click Delete, the entry will go to your Recently Deleted folder.

At the bottom of the list, select Recently Deleted. To completely delete an entry, swipe left on it and click Erase.
How to automatically delete entries
The process of deleting records can be automated. To do this, go to Settings and select Voice Recorder.
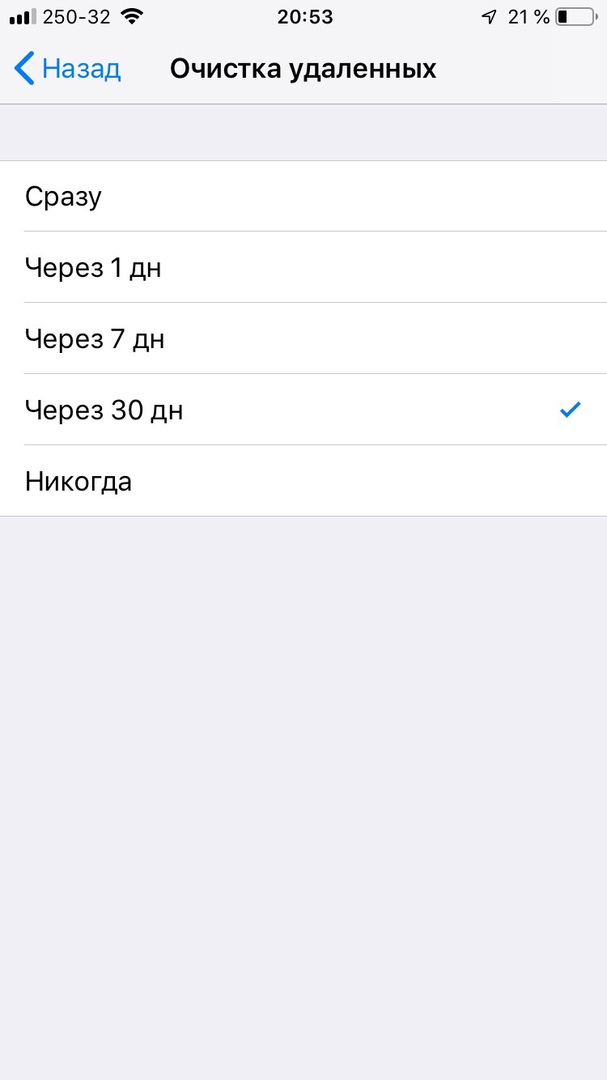
In the Deleted Cleanup section, you can select the deletion interval: immediately, after 1 day, after 7 days, after 30 days, or never. We recommend choosing 30 days.
How to change the sound quality
In the same section, you can change the sound quality of the recordings. To do this, click Sound quality and select:
- Compressed – if you have little memory.
- Lossless – if you have enough memory and you want the best sound quality.
How to change the standard names
If you do not like that the recordings are named after the location in which they were recorded, you can return the old names. To do this, in the same section, click on the radio button next to Geo-context names.
Tip: start recording from Control Center
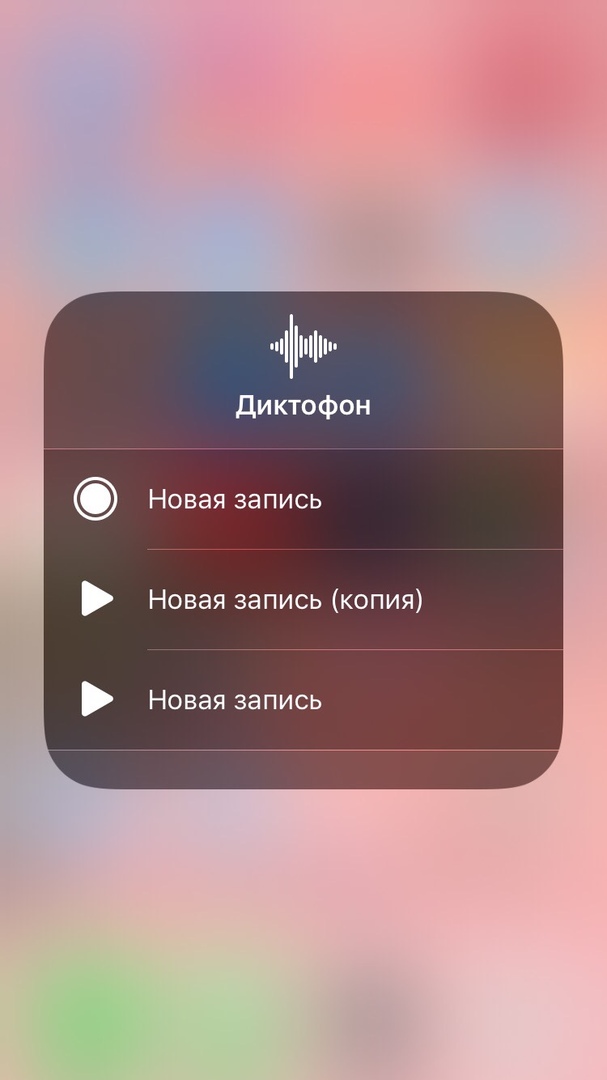
In iOS 12, there is a Voice Recorder icon for the Control Center. Go to Settings -> Control Center -> Customize Controls and add it.
Then hold down the icon in Control Center (or click on it with 3D Touch) to open a menu where you can start a new recording. You can also quickly open your recent posts.
